

Anonymous
-
Content Count
515 -
Joined
-
Last visited
-
Days Won
13
Posts posted by Anonymous
-
-
May be your iso file is getting corrupted .check your iso via abgx 360
Sent from my Xperia Miro using Tapatalk
-
Use xbox backup creater Andthen extract your iso file
Sent from my Xperia Miro using TapatalkHow do I turn them into xex formar?
-
Sry I did typed wrongly now I change it ..
Sent from my Xperia Miro using Tapatalk
-
first u need to convert xex format for this both iso in your pc afterthen doing this procedureDo you have to transfer both iso files to your xbox hard drive before doing this procedure? Or do you have to turn them into xex format first?
-
The day by day peoples want some technology changes. my point is if xebuild was In Android device it's easiest way for dashboard updates so we don't need to turn on a PC, don't wan't put pendrive to xbox for updation .can u make this stuff .this app ssoo helpful for peoples .
Sent from my Xperia Miro using Tapatalk -
 Can any one make xbuild app for Android device, its possible or not
 Sent from my Xperia Miro using Tapatalk
-
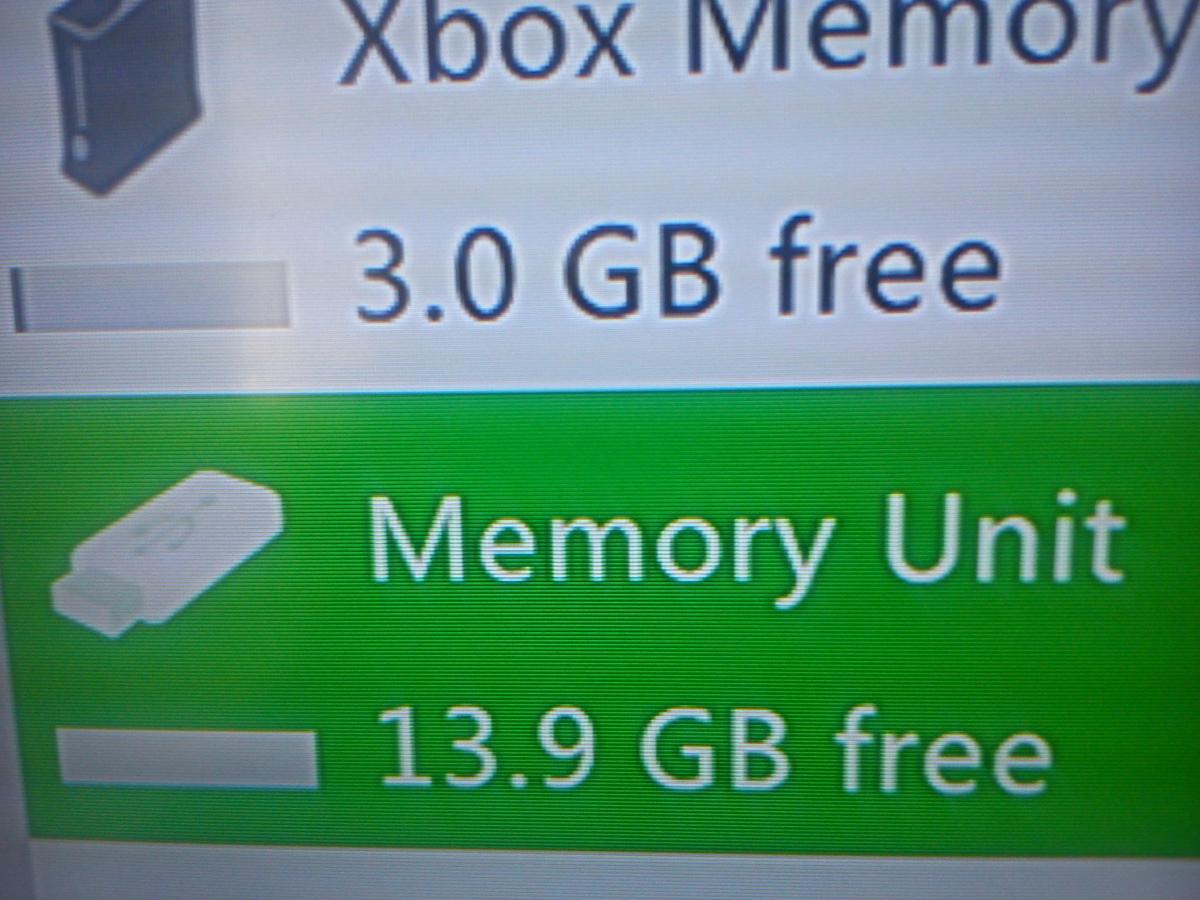
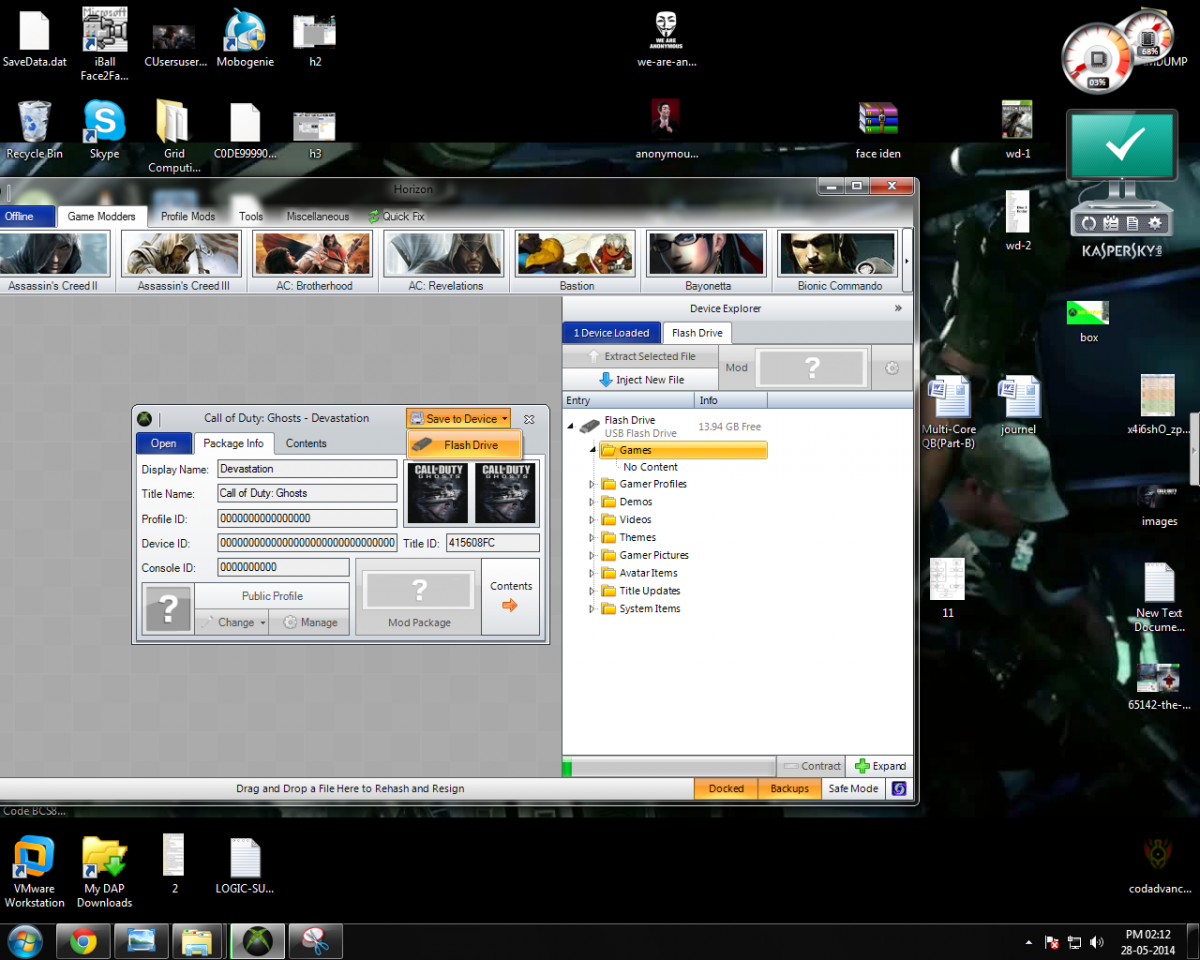
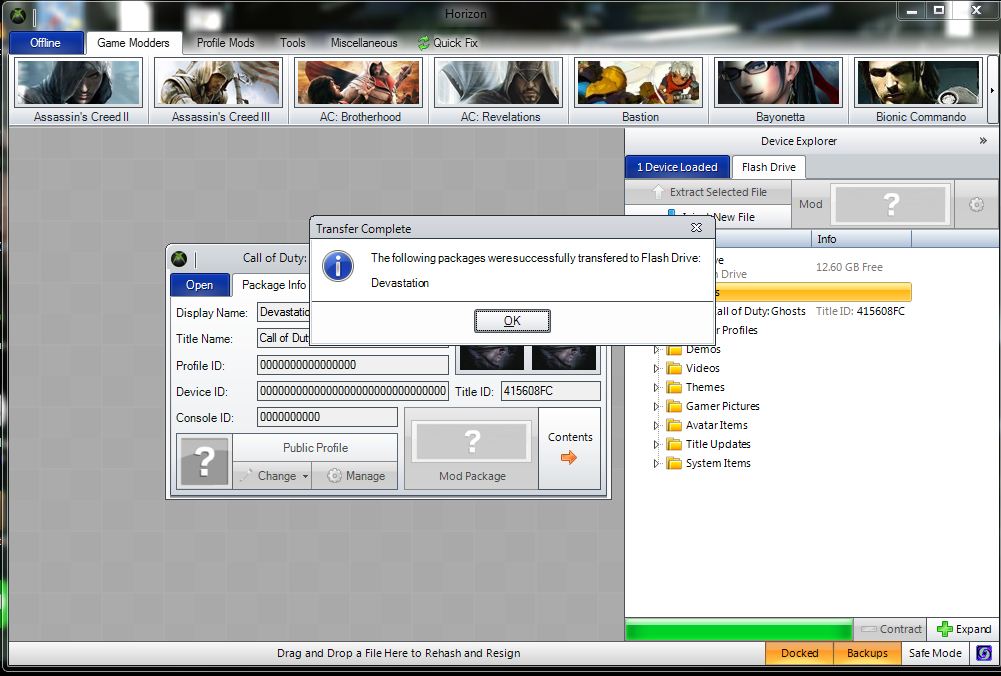
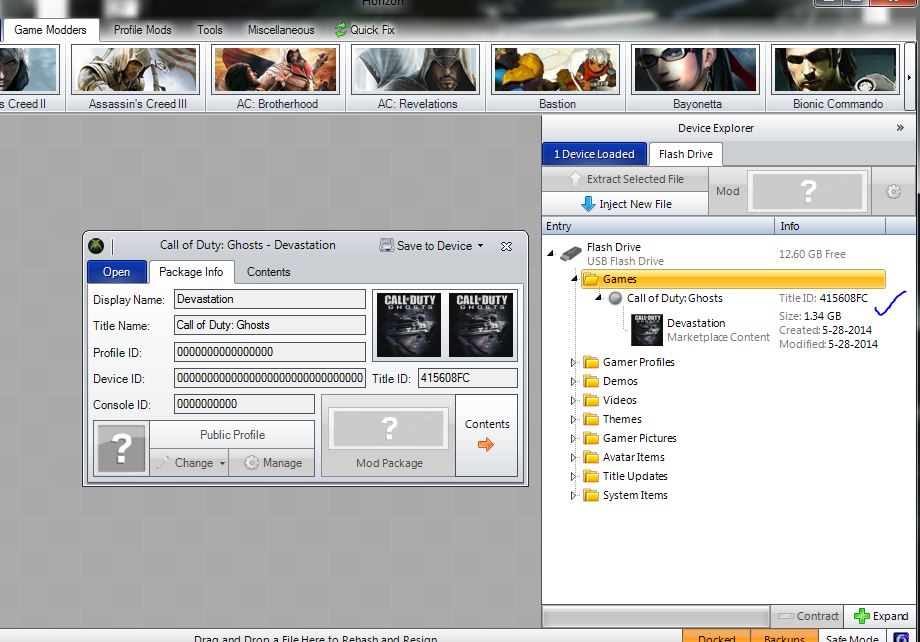
Hi guys,
Today I am going to show you how transfer dlc and title updates to your usb flash drive.
I hope this tut will be useful for you.
Ok let's we start,
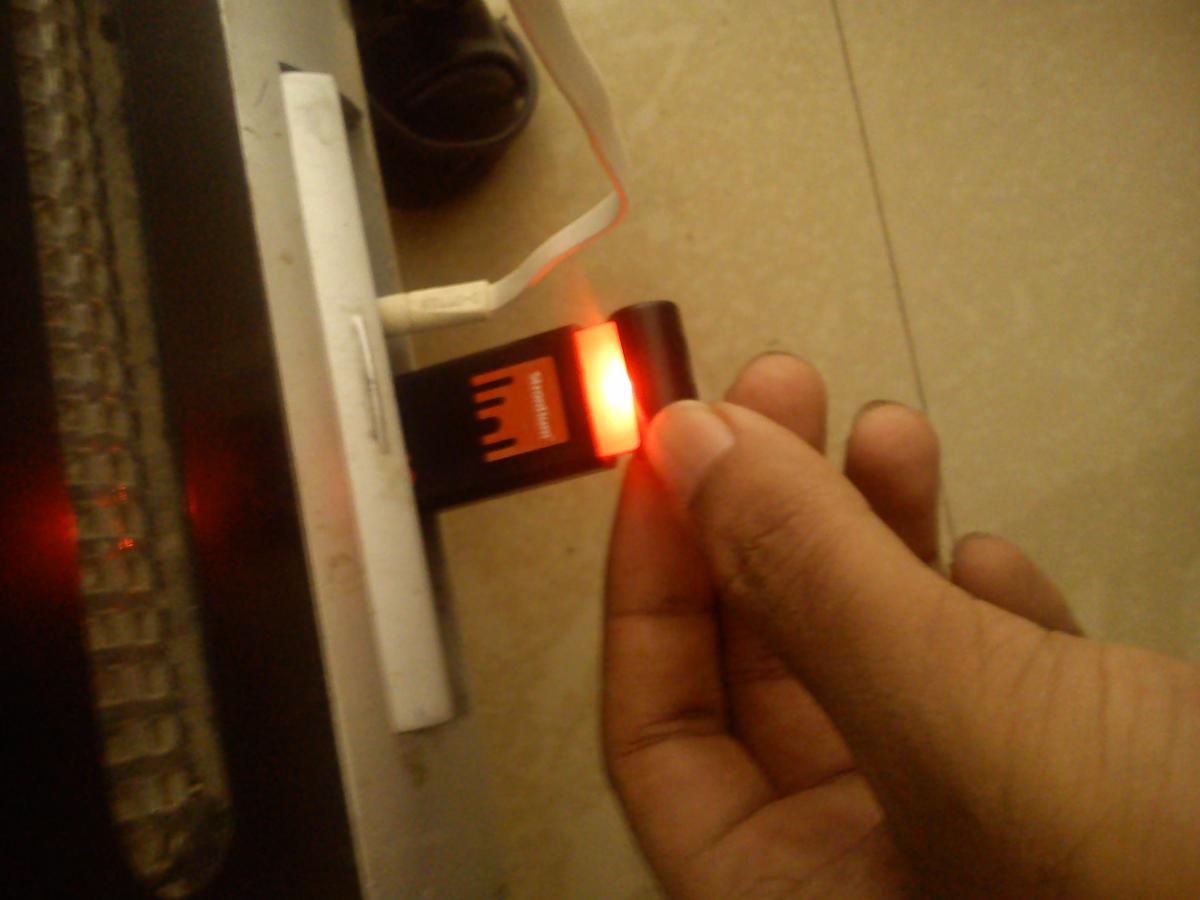
step1: firstly Put your USB flash drive to your xbox360 console
step2:andthen you have to configure your USB flash drive
step3: afterward put your USB flash drive to pc
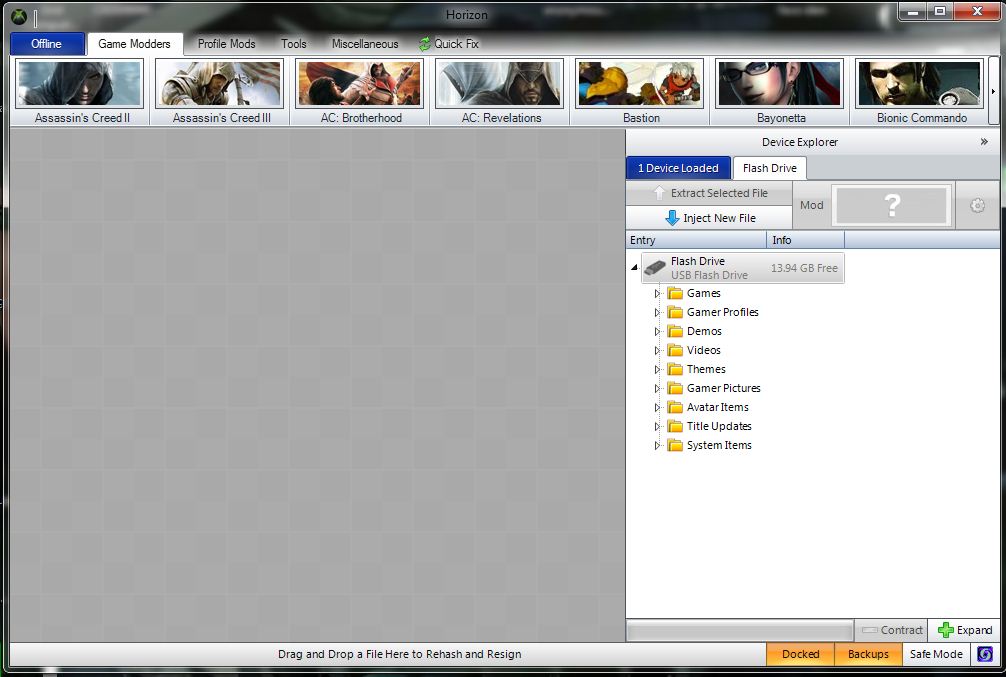
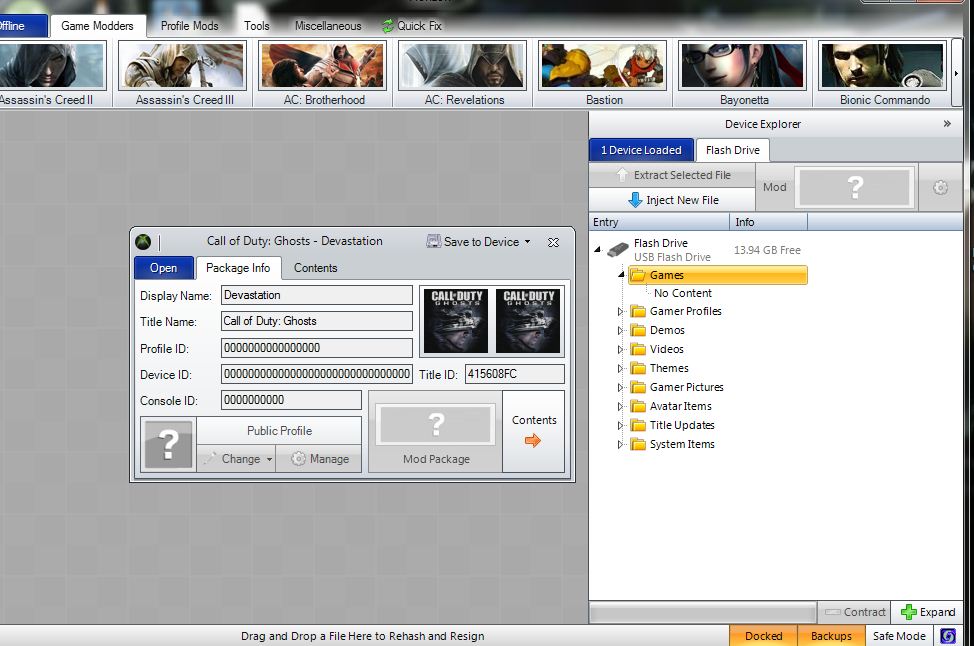
step4:start the horizon app
step5:drag a dlc to horizon app
step6:andthen save to your device

now everything completed enjoyyyyy [emoji6] [emoji106]
[emoji106]

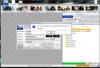
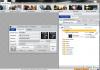
horizon app

-
 1
1
-
-
Useful Tools:
Latest multiMAN
eEID Root Key Dumper (3.55)
eEID Root Key Dumper (4.50)
Latest PPC+
Latest Showtime
Latest mmTOOLS
Latest reActPSN
CFWs:
Latest Rebug CFWs
Latest Rogero CFW
Latest ZER0 (HABIB)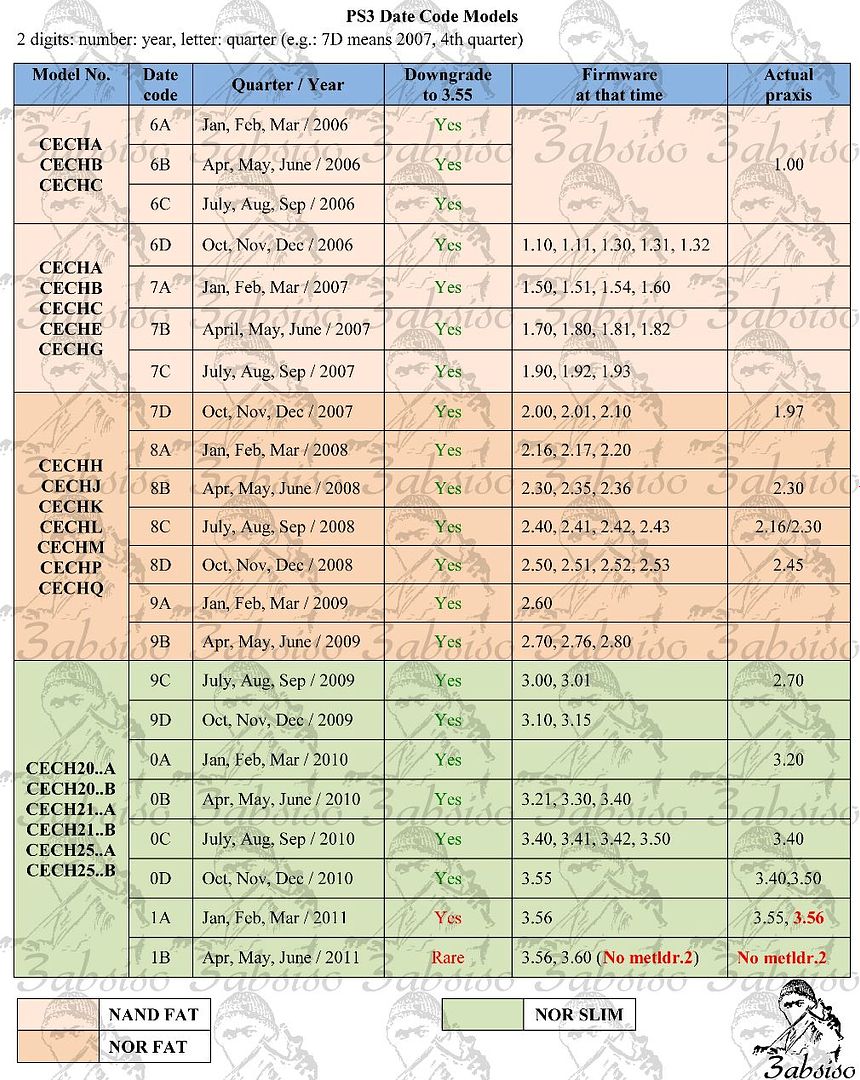
Here are the guides for installing the latest 4.xx CFWs on your PS3:
If you're on OFW higher than 3.55, you CAN'T install CFW directly! You need to check if your model is old enough to be hackable (older than June 2011). If you're lucky enough and it is hackable, you can use a hardware flasher (NOR Guide | NAND Guide) to dump your 3.56+ flash, patch it and re-flash it before you can install CFW using the guides below. If your PS3 is not hackable, you CAN'T install CFW at all. Your only option would be to install an ODE to be able to run homebrew and backups.
If you're already on CFW, you can always start with the 2 (optional) steps below before installing the CFW of your choice:Dump your NOR/NAND Flash:
Download and install the latest version of multiMAN (CEX) from the link above, plug in a FAT32 formatted USB flash drive into the right USB port, launch multiMAN under the Game column and go to mmOS > Press O on any file > Open in HEX viewer > Press SELECT > Press START > Export GameOS LV2: Select No > Export HV LV1: Select No > Export FLASH: Select Yes
This creates a backup of your NOR/NAND flash so that you can recover using a hardware flasher in case of a (highly unlikely) brick. It is recommended to do it every time you upgrade/downgrade your CFW just in case something goes wrong.
Dump your eEID Root Key:
This has to be done only once, while (and if) still on 3.55/4.50 CFW, just in case you want to ever switch to DEX in the future without having to downgrade back to 3.55/4.50 CFW to dump it.
Download and install the correct eEID_RKDumper.pkg for your CFW version (3.55/4.50) > Unplug all USB devices > Launch eEID RKDumper under the Game column. It will black screen for 10-15 seconds, beep 3 times and reboot automatically. Now FTP to your console and retrieve your Root Key/PCK1 (48 bytes) from /dev_hdd0/tmp/eid_root_key if on 3.55 or /dev_hdd0/game/FLTZ00010/USRDIR/eid_root_key if on 4.50. Once you retrieve your Root Key, you can delete eEID RKDumper from your XMB as it is not needed anymore.Rebug 4.46.1 LITE:
This CFW can only be installed on top of CEX FWs. If you're on a DEX FW, you have to convert to CEX before you can install this CFW. If you don't know what CEX/DEX is, you're most likely on a CEX FW.
If you're on 3.55 or lower OFW, or a hardware flasher patched 3.56+ OFW, or any 4.46 or lower CFW, you can install Rebug 4.46.1 LITE from XMB by following the guide below:1- Install Rebug 4.46.1 LITE from XMB:
Download the latest Rebug LITE from the link above, verify the md5 hash with @DEFAULTDNB 's PPC+, rename the PUP to PS3UPDAT.PUP, put it on your FAT32 formatted flash drive in PS3UPDATE, go to System Update and Update via Storage Media. Make sure there's NO original game disk in the drive, NO game is mounted and that you DON'T Update via Internet or else you would risk installing OFW >3.55!
2- Enable QA:
Go to Package Manager > Install Package Files > PS3 Hard Disk and install Rebug Toolbox. Launch it under the Game column, go to Utilities and change Toggle QA Flag to Enabled. This is to ensure easier and safer downgrading.
Notes:
OFW 4.55 has been released, make sure you don't accidentally update. You also need a spoofer to connect to PSN (with ban risk).
Make sure you use mM 4.46.00 or higher because older versions are not compatible with this CFW.
Make sure you install the Rebug Toolbox pkg included inside Package Manager because older versions are not compatible with this CFW.
Make sure you use reActPSN v2.27 or higher because older versions might not be fully compatible with this CFW.Rebug 4.46.1 REX/D-REX:
If you're on a CEX FW, you have to install the REX Edition. If you're on a DEX FW, you have to install the D-REX Edition.
If you're on 3.55 or lower OFW, or a hardware flasher patched 3.56+ OFW, or any 4.46 or lower CFW, you can install Rebug 4.46.1 REX/D-REX from XMB by following the guide below:1- Install Rebug 4.46.1 REX/D-REX from XMB:
Download the latest Rebug REX/D-REX from the link above, verify the md5 hash with @DEFAULTDNB 's PPC+, rename the PUP to PS3UPDAT.PUP, put it on your FAT32 formatted flash drive in PS3UPDATE, go to System Update and Update via Storage Media. Make sure there's NO original game disk in the drive, NO game is mounted and that you DON'T Update via Internet or else you would risk installing OFW >3.55!
2- Enable QA:
Go to Package Manager > Install Package Files > PS3 Hard Disk and install Rebug Toolbox. Launch it under the Game column, go to Utilities and change Toggle QA Flag to Enabled. This is to ensure easier and safer downgrading.
Notes:
OFW 4.55 has been released, make sure you don't accidentally update. You also need a spoofer to connect to PSN (with ban risk).
Make sure you use mM 4.46.02 or higher because older versions are not compatible with this CFW.
Make sure you install the Rebug Toolbox pkg included inside Package Manager because older versions are not compatible with this CFW.
Make sure you use reActPSN v2.27 or higher because older versions might not be fully compatible with this CFW.Rogero 4.55 v1.xx:
This CFW can only be installed on top of CEX FWs. If you're on a DEX FW, you have to convert to CEX before you can install this CFW. If you don't know what CEX/DEX is, you're most likely on a CEX FW.
If you're on 3.55 or lower OFW, or a hardware flasher patched 3.56+ OFW, or any 4.55 or lower CFW, you can install Rogero 4.55 v1.xx from XMB by following the guide below:1- Install Rogero 4.55 v1.xx from XMB:
Download the latest Rogero CFW from the link above, verify the md5 hash with @DEFAULTDNB 's PPC+, rename the PUP to PS3UPDAT.PUP, put it on your FAT32 formatted flash drive in PS3UPDATE, go to System Update and Update via Storage Media. Make sure there's NO original game disk in the drive, NO game is mounted and that you DON'T Update via Internet or else you would risk installing OFW >3.55!
Notes:
This CFW is built from OFW 4.55, so it prevents accidental updates to OFW >3.55 and allows PSN access (with ban risk) without the need for a spoofer.
QA is enabled by default on this CFW.
Make sure you use mM 4.55.00 or higher because older versions are not compatible with this CFW.
Make sure you use reActPSN v3.12 or higher because older versions might not be fully compatible with this CFW.ZER0 (HABIB) 4.55 V1.xx: [iNSTALL AT YOUR OWN RISK]
This CFW can only be installed on top of CEX FWs. If you're on a DEX FW, you have to convert to CEX before you can install this CFW. If you don't know what CEX/DEX is, you're most likely on a CEX FW.
If you're on 3.55 or lower OFW, or a hardware flasher patched 3.56+ OFW, or any 4.55 or lower CFW, you can install ZER0 4.55 V1.xx from XMB by following the guide below:1- Install ZER0 4.55 V1.xx from XMB:
Download the latest ZER0 CFW from the link above, verify the md5 hash with @DEFAULTDNB 's PPC+, rename the PUP to PS3UPDAT.PUP, put it on your FAT32 formatted flash drive in PS3UPDATE, go to System Update and Update via Storage Media. Make sure there's NO original game disk in the drive, NO game is mounted and that you DON'T Update via Internet or else you would risk installing OFW >3.55!
Notes:
This CFW is built from OFW 4.55, so it prevents accidental updates to OFW >3.55 and allows PSN access (with ban risk) without the need for a spoofer.
QA is not enabled by default on this CFW. Enable QA before installation.
Make sure you use mM 4.55.00 or higher because older versions are not compatible with this CFW.
Make sure you use reActPSN v3.12 or higher because older versions might not be fully compatible with this CFW.-
1
-
-
This kind of thread is already created from some one so plz don't create repeated thread.while u do anything before plz check the time line
Noobs are SSO confused this kind of issue. jpizzle plz attention this issue can u update your RSS feed for this issue .like this"cod ghost tu13 need's com pack 2" bcz few peoples only using tu13.others don't know abt that
Sent from my Xperia Miro using Tapatalk
-
So nw it's gud time for close my thread anyway thankyou for your reply's swizzy
Sent from my Xperia Miro using Tapatalk
-
Before i am using that
no fcrt patch but Nw I am not using that
Sent from my Xperia Miro using Tapatalk
-
Then how it is possible for my hacked nand my hacked nand accepted Donner fcrt patch nw my console was working without any problem.y don't accept doner fcrt.bin my maked retail nand (I mean how is it not possible for making retail nand )can u explain that actually what is the jop for fcrt.bin
Sent from my Xperia Miro using Tapatalk
-
Swizzy Today I was reflashed my console I did put fcrt patch on my hacked nand(getting from Donner nand) I was tested now every thing working gud .nw can I make retail nand any chance for dual boot??before u said without fcrt patch don't work for retail doner need was oly smc purpose but nw I have fcrt for my nand nw my console was working fine.. I am going TO remove my Rgh for testing purpose bcz nw I don't hav dual nand chip,my question is if I put my (own maked )retail nand on my console any chance for getting bann bcz I am going to connect live
Sent from my Xperia Miro using Tapatalk
-
Wait I'll send ur inbox
Sent from my Xperia Miro using Tapatalk
-
1
-
-
If you're on OFW higher than 3.55, you CAN'T install CFW directly!
-
what's your ps3 model num -

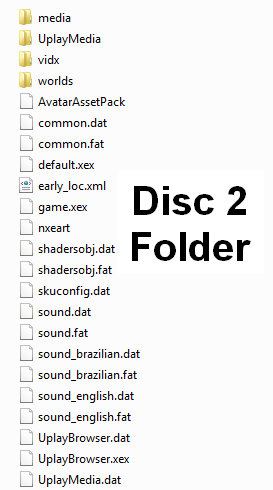
Game Data Contents is Located in Disc 1, Disc 2 is where the main game launches from.
Game is tested with the FIXED Version of the game in Extracted Format (.xex).
(Minimum Dashboard Version Required: v2.0.16537.0)
Instructions:
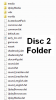
Copy the contents of installation1 and installation2 (Located in Disc 1) to the folder of Disc 2.
The Picture below shows the files and folders that should be in Disc 2 Afterwards:
Once done Copying the necessary contents to Disc 2, You may keep or delete Disc 1 to save space.
Launch the game with "game.xex".
FSD Users: Rename, Delete or backup the original default.xex file (For later use with Title Updates for Compatibility purposes) then rename "game.xex" to "default.xex" and launch it using FSD.
The Game should Not be used with an Internal Hard Drive if it causes cutscenes to be laggy to the point that you can't progress from the start of the game. A good example is to watch through the opening scene of a New Game and see if it lags.
*If it lags, Just play the game using an External Hard Drive.
The folder structure used is as follows:
Games \ Watch Dogs \ Disc 2 \ Extracted Files.
*The game runs fine with FSD and DashLaunch and has no problem so far.
Tested on:
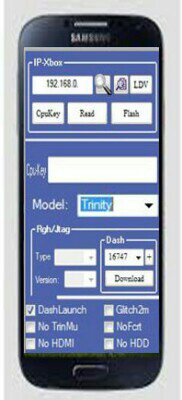
XBOX 360 Slim 4GB trinity
RGH Glitch 2
Dash: 16747
FSD 3 rev 775
xexmenu
DashLaunch 3.12

(This Tutorial May Apply To RGH/JTAG Users Only)
Here is my fb page
https://m.facebook.com/www.box360play.blogspot.in?_rdr
enjoy


-
1
-
-
Swizzy u r awsm.
I was boot it up via xell nw
everything working gud thanks for your guidens
Sent from my Xperia Miro using Tapatalk
[emoji2][emoji106] -
I am using xm player 0.0.4
DL 3.12,Kernal 16747 but while I try to play the movie file(such like mkv,mp4,avi) it was freezing ,not response
Sent from my Xperia Miro using Tapatalk
-
Krig Raven@ thank you bro I was fix my issue
Sent from my Xperia Miro using Tapatalk
-
thank you swizzy ur guess was correct .My guess is that you etheir used a faulty formatting tool which repartitioned your drive to 300gb instead of 1TB or something along those lines...
Sent from my Xperia Miro using Tapatalk
-
1
-
-
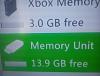
not 300gb .I am loosing approximately 700 GBI cant believe that u are loosing 300gb just because of the fat32! NTFS wont work.
Sent from my Xperia Miro using Tapatalk
-
I am using 1 tp external HDD(fat 32) for my rgh console but now I have 300gb space bcoz of fat32 conversion. I don't knw where was gone my balance700 gb space.Any way to connect with my console via NTFS ???
Sent from my Xperia Miro using Tapatalk
-
Plz remove that link bcz u r break the forum rules..
Sent from my Xperia Miro using Tapatalk
-
1
-


Question about Dual Nand (Matrix Trident)
in Other topics
Posted
Lt is designed for retail console. so u don't be afraid for connect to live
Sent from my Xperia Miro using Tapatalk